

Quick Start Guide
Get started with Icegram Express—set up subscriber lists, design opt-in forms, and send your first newsletter.
Icegram Express is an all-in-one email marketing plugin for WordPress that lets you grow your subscriber base, send automated post notifications, build newsletters, and automate subscriber journeys directly from your dashboard.
Follow this quick guide to configure your site, collect subscribers, and launch your first email campaign.
1. Add a Subscription Form
To start capturing email addresses, publish an opt-in form on your website:
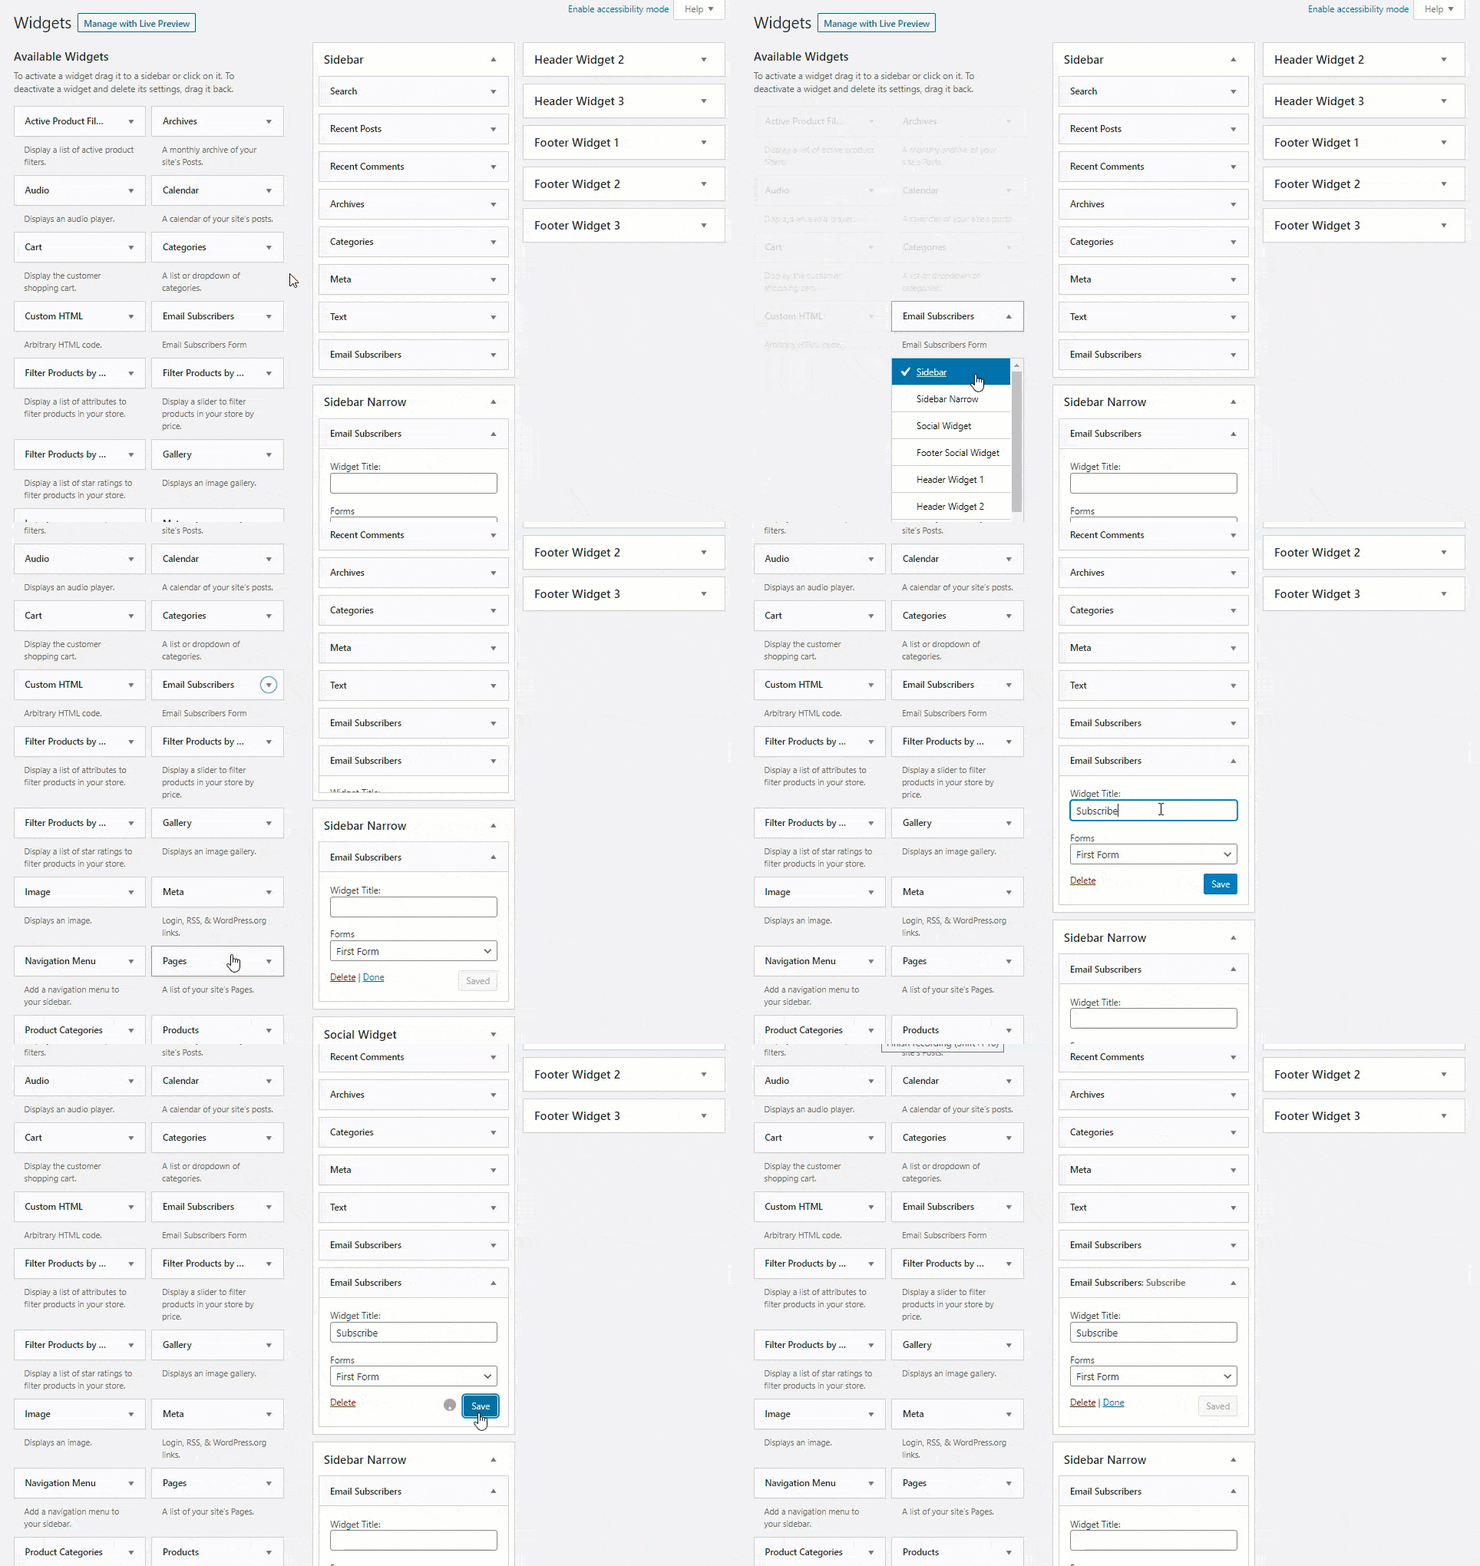
- In your WordPress admin, go to Appearance > Widgets.
- Locate the Icegram Express widget and add it to your sidebar or footer area.
- Choose the target subscriber list and customize the button text.
- Save the widget.
2. Manage Subscriber Lists
Every subscriber belongs to one or more lists (e.g., “Main”, “Newsletter”, “Customers”).
Navigate to Icegram Express > Audience to manage contacts, view subscription statuses (Subscribed, Unconfirmed, Unsubscribed), or manually add new lists.
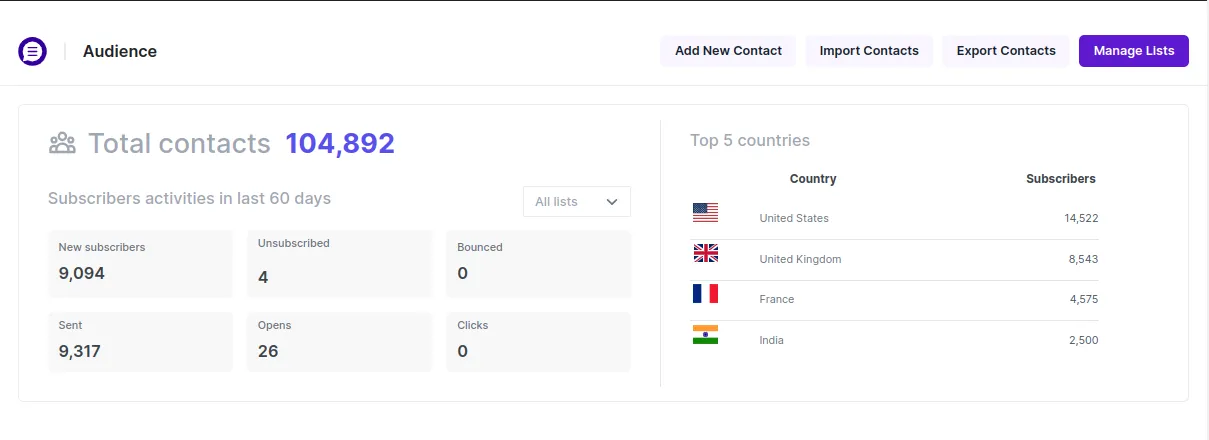
See our detailed guide on managing subscriber lists and statuses.
3. Import Existing Contacts
If you already have a contact list from Mailchimp, MailPoet, or a CSV export:
- Go to Icegram Express > Audience.
- Click Import Contacts.
- Upload your CSV file, map the email and name fields, and select the destination list.
- Confirm your import.
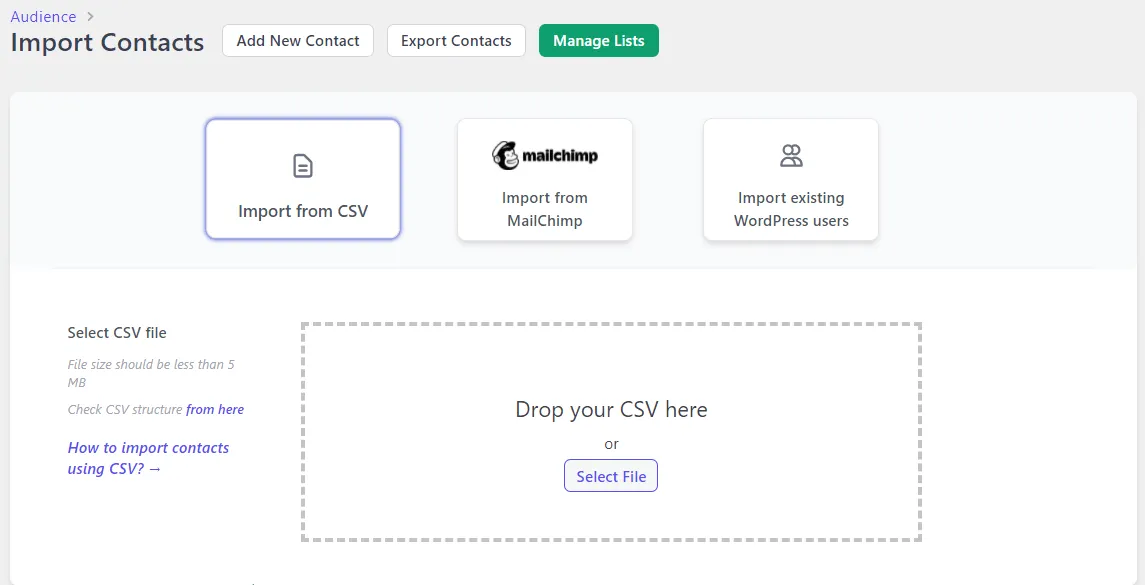
See importing contacts.
4. Send a Test Email
Before sending a campaign to your audience, verify that your server or mailer can deliver emails successfully:
- Go to Icegram Express > Settings > Email Sending.
- In the Send Test Email section, enter your personal email address.
- Click Send Email.
- Check your inbox (and spam folder) to verify that the test email arrived safely.

5. Create Your First Broadcast Campaign
Newsletters and promotional announcements are sent as Broadcasts:
- Go to Icegram Express > Campaigns and click Create Campaign.
- Select Broadcast.
- Choose your email template or start from scratch using the Drag & Drop visual editor.
- Set your email subject line, sender details, and target recipient list.
- Send immediately or schedule for a specific date and time.
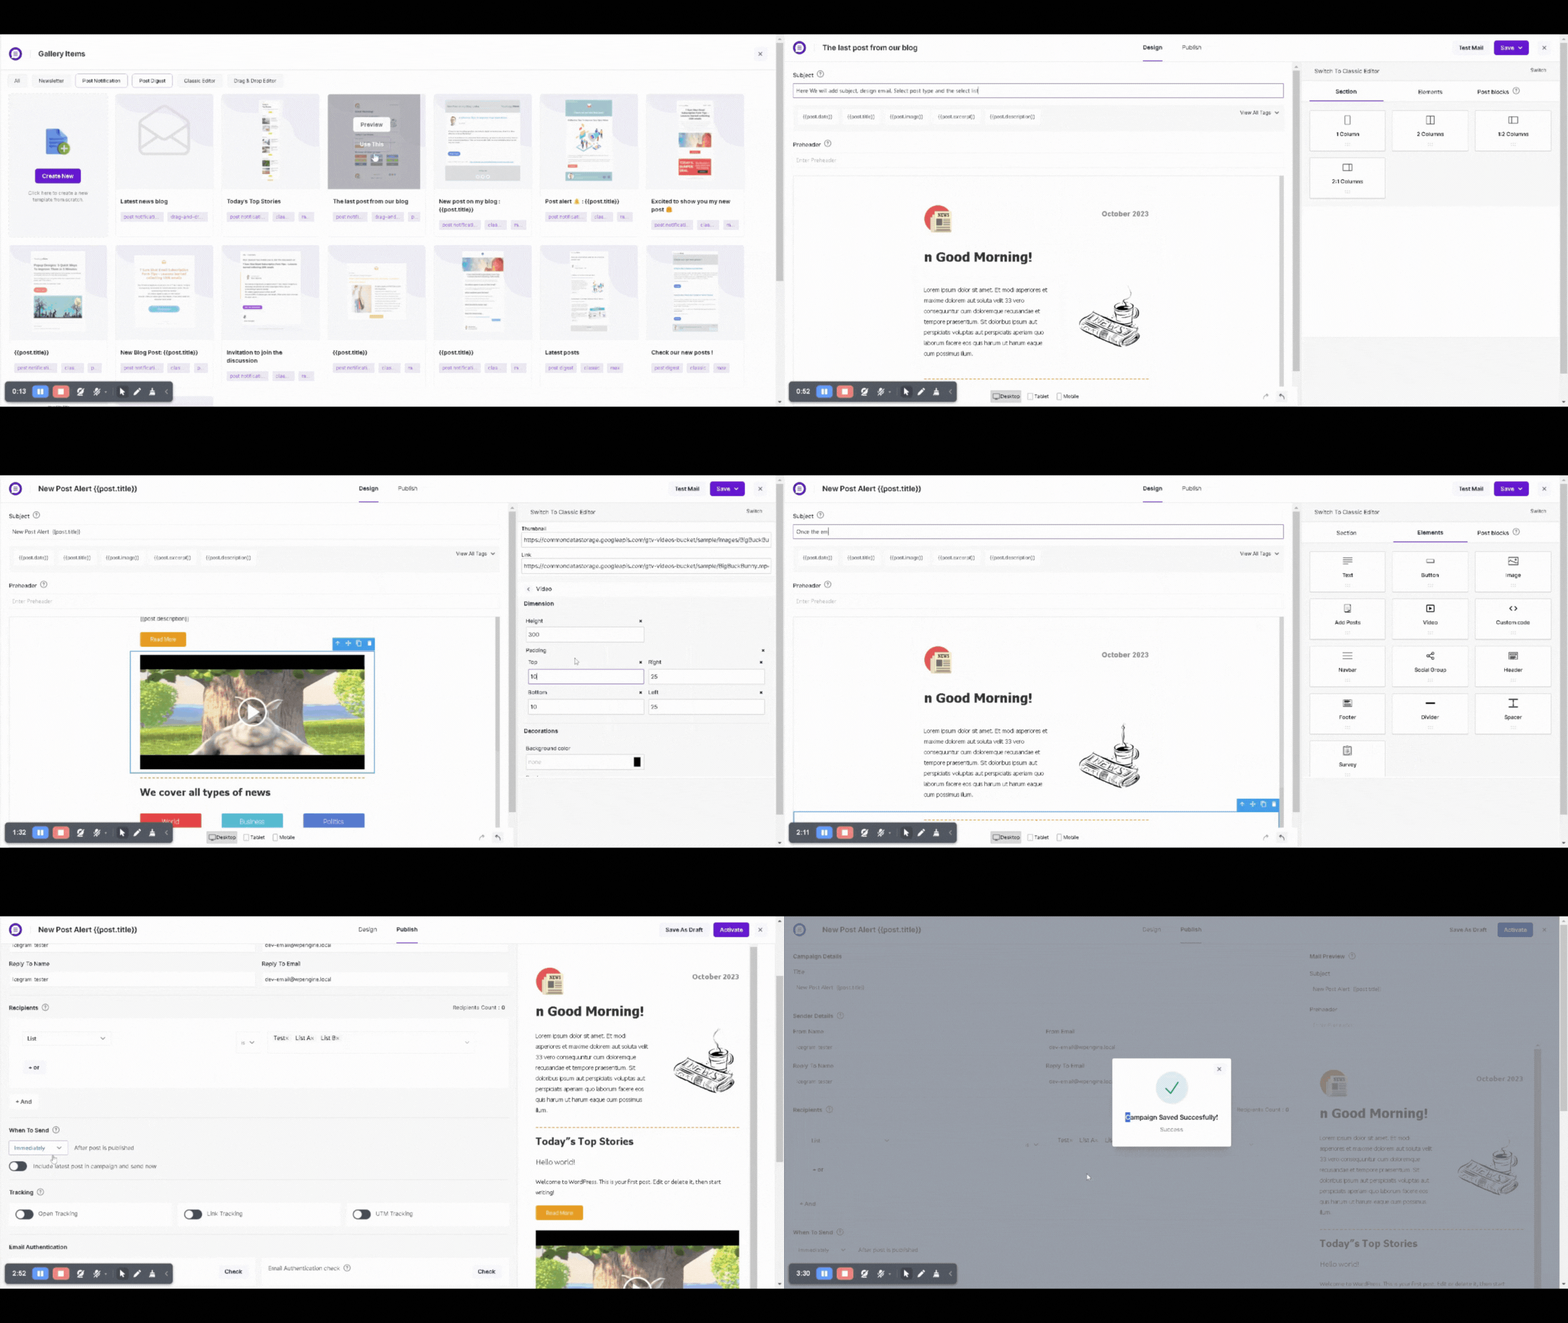
Learn more in our guide to creating and sending broadcasts.
Recommended Deliverability Settings
To maintain high inbox placement and avoid spam folders:
- Use a dedicated mailer: By default, emails are sent via WordPress
wp_mail(). We strongly recommend configuring an external SMTP server or dedicated API mailer (like Amazon SES, SendGrid, or Postmark). See configuring mailers. - Match your “From” email domain: Your sender email must match your site’s domain (e.g.,
newsletter@yourdomain.com). - Set up reliable cron execution: Free plans rely on WP-Cron, which triggers only on website traffic. For high volume, configure a cPanel/server cron job or upgrade to Icegram Express Pro or Max for managed automated background cron.