Rest API
How to manage contact through REST API
To manage subscribers through REST API, you will first need to create a REST API authentication key which will be used later to validate REST API requests.
1: Create a new REST API key
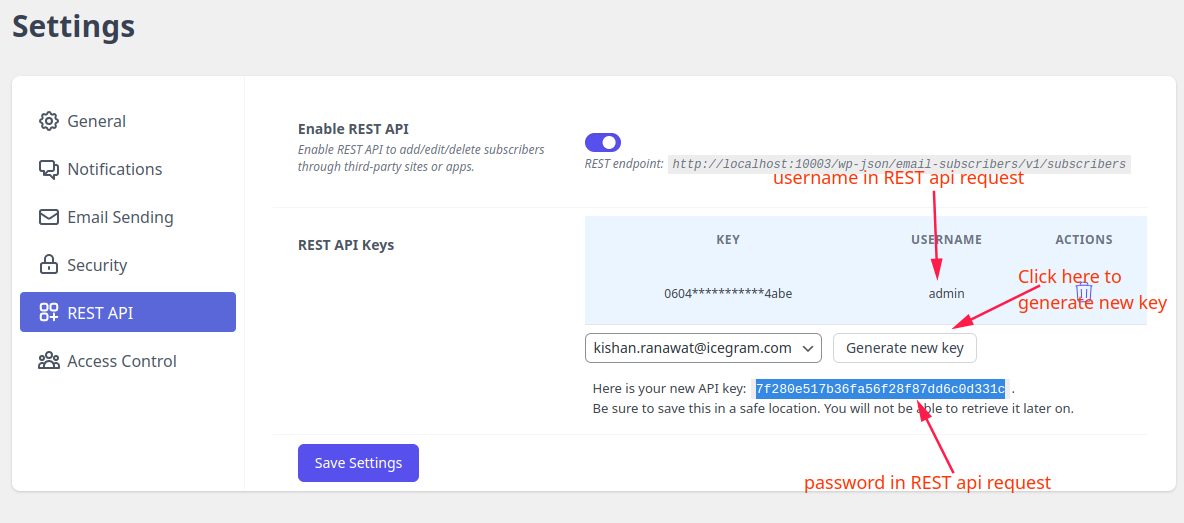
Go to Icegram Express → Settings → REST API page.
Select the admin user email and click on Generate new key button. A new API key will be generated.
Copy and save the generated REST API key in a safe location.
2: Locate REST API URL
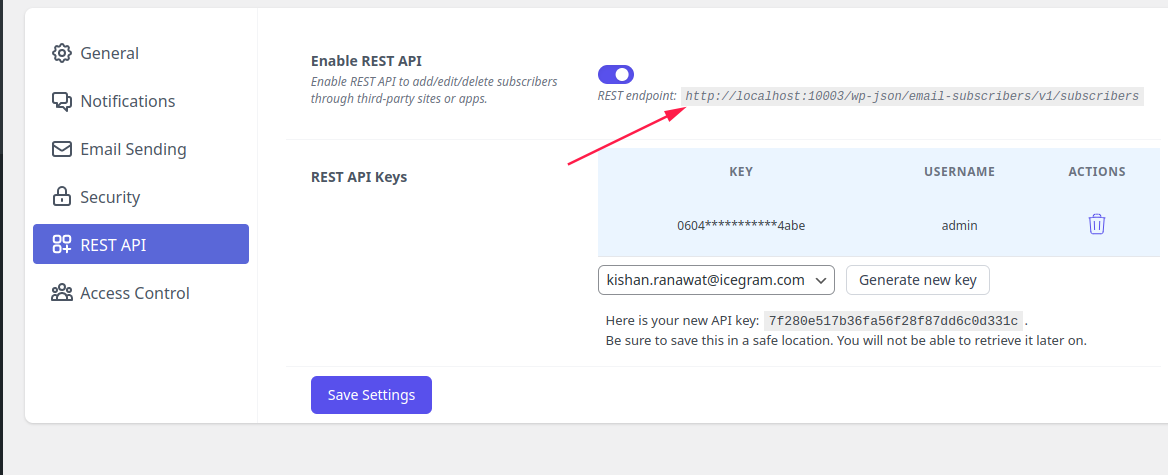
REST API URL can be located from the REST API section on the settings page. This URL then can be used to send requests.
3: Add authentication data. While sending request to REST API endpoint
- Set Content-Type header to application/json.
- Set username header to the username created in the first step
- Set password header to REST API key generated in the first step
4: Add subscriber: After adding authentication data as mentioned in the 3rd step, refer to the following steps to a add subscriber
- Set request type to POST
- Add the subscriber data in JSON format.
Currently following data can be passed
- email - Subscriber email address
- first_name - Subscriber first name
- last_name - Subscriber last name
- list_ids - List of ids to which subscriber should be added. This list IDs can be found on Icegram Express → Audience → Manage Lists page.
- list_status - List’s status for the subscriber. Can have the following values subscribed/unconfirmed/unsubscribed
Here is an example code in CURL.
curl --header "Content-Type: application/json" \
--header "username: admin" \
--header "password: 7f280e517b36fa56f28f87dd6c0d331c" \
 --request POST \
 --data '{
 "email": "test@example.com",
 "first_name": "Test",
 "last_name": "User",
 "list_ids": [1,2],
 "list_status": "subscribed"
}' \
 http://example.com/wp-json/email-subscribers/v1/subscribers
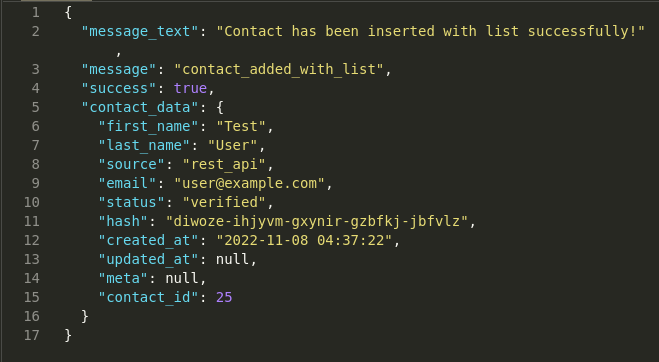
The REST API sends the response in JSON format. If the subscriber was added successfully then the response success parameter will be true.
Update subscriber
To update a subscriber, currently, you will need the contact ID and new subscriber data.
- Set request type to PUT
- Add the subscriber data in JSON format.
Currently following data can be passed
- contact_id - Contact ID
- email - New email address
- first_name - New first name
- last_name - New last name
- list_ids - List of ids to which the subscriber should be added. This list IDs can be found on Icegram Express → Audience → Manage Lists page.
- list_status - List’s status for the subscriber. Can have the following values subscribed/unconfirmed/unsubscribed
After updating contacting, you should see the following response
Response when updating only contact data
type to PUT
- Add the subscriber data in JSON format.
Currently following data can be passed
- contact_id - Contact ID
- email - New email address
- first_name - New first name
- last_name - New last name
- list_ids - List of ids to which the subscriber should be added. This list IDs can be found on Icegram Express → Audience → Manage Lists page.
- list_status - List’s status for the subscriber. Can have the following values subscribed/unconfirmed/unsubscribed
After updating contacting, you should see the following response
- Response when updating only contact data
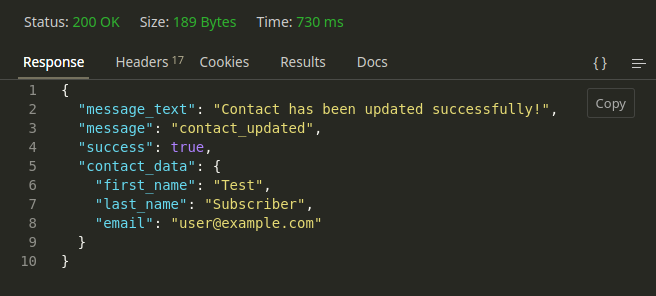
- Response when adding contact to another list'

Delete subscriber
To delete a subscriber, you will need a contact ID.
- Set request type to DELETE
- Add the subscriber data in JSON format.
Currently following data can be passed
- contact_id - Contact ID
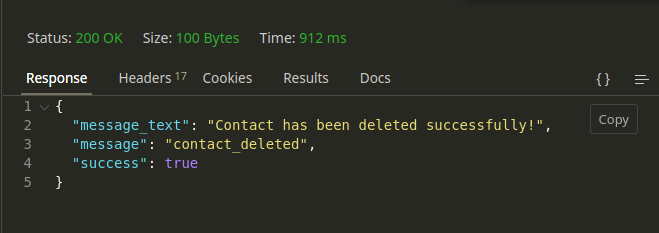
- After sending the delete request, you should get the following response.
