Getting Started
Icegram Express is a complete newsletter plugin that lets you collect leads, send automated new blog post notification emails, create & send broadcasts and also manage them all in one single place.
The plugin is available in three versions, including a free version. Please take a look at ourpricingpage to learn more and for detailed comparison of our features.
After deciding which version to use and installing the plugin, you can start by adding a subscription form to your website.
Adding the subscription form
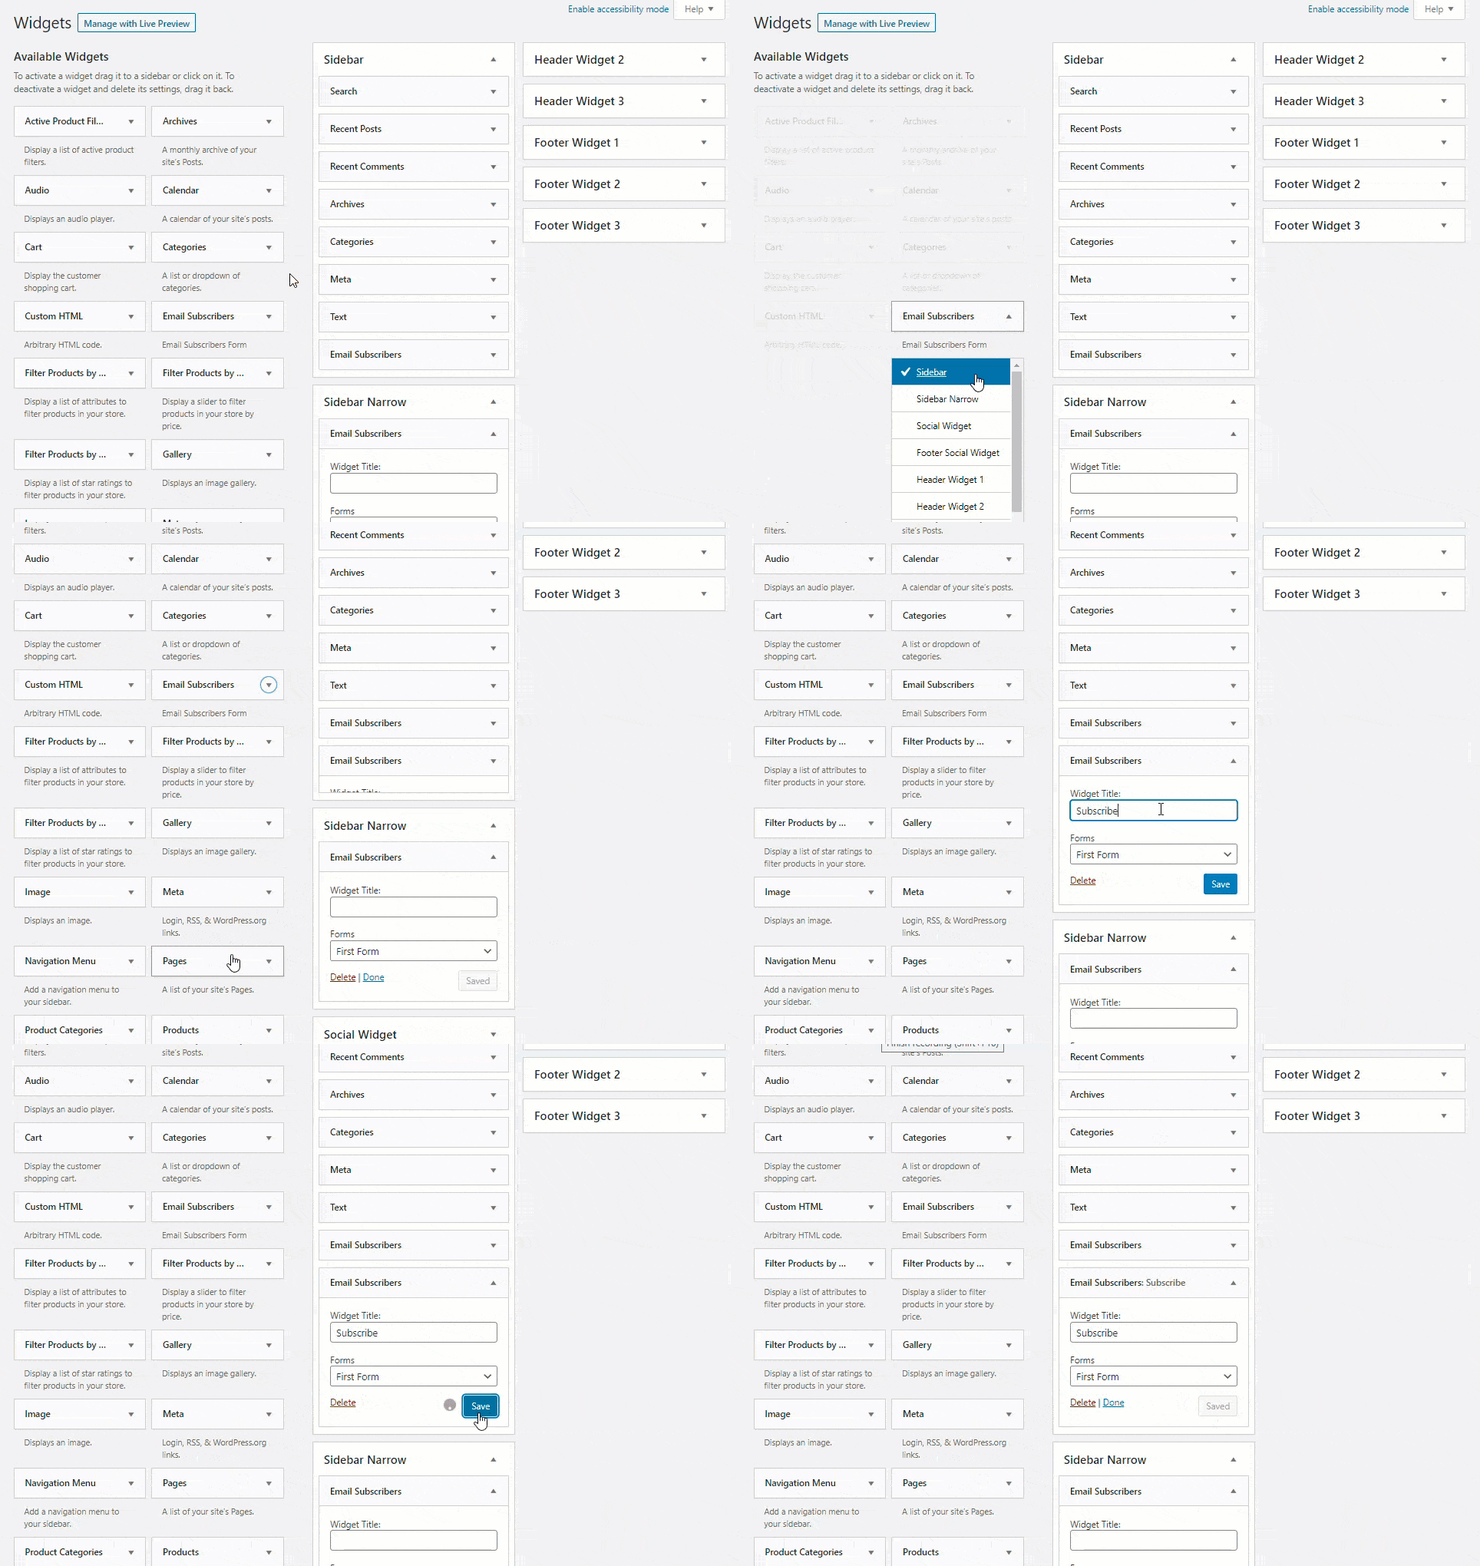
Icegram Express allows you to create subscription forms that you can customize and show to the visitors/users in the widget area using a widget, theme files or wherever you want using the shortcode.
Since Icegram Express version 4.5.5, we have included the step of adding a widget as a part of onboarding process in the plugin. You can skip this part if the form is already added as a widget.
To add a widget,
- Go to WordPress
Dashboard>Appearance>Widgets - Drag and drop the Icegram Express widget or add it to a support widget area

Please take a look at this article for alternative ways to show the subscription form on your website.
Adding and managing lists
A list is a collection of email addresses that you have received through the subscription form or in other ways like contact import or Workflows.
Using the form added to the front end, your visitors may have already subscribed to your website and they can be seen under Icegram Express > Audience. By default, two lists are available for you to get started and you are welcome to add more.
Please take a look at this article to learn more about Audience, lists and statuses.
If your aim is only to get subscribers or capture leads, Audience would be the place to manage them, but we encourage you to continue reading the guide to learn how to run your first campaign.

Icegram Express is a full-fledged email marketing plugin that helps you configure the email limits and notifications as you wish. Please take a look at this article for directions on how to configure the settings.
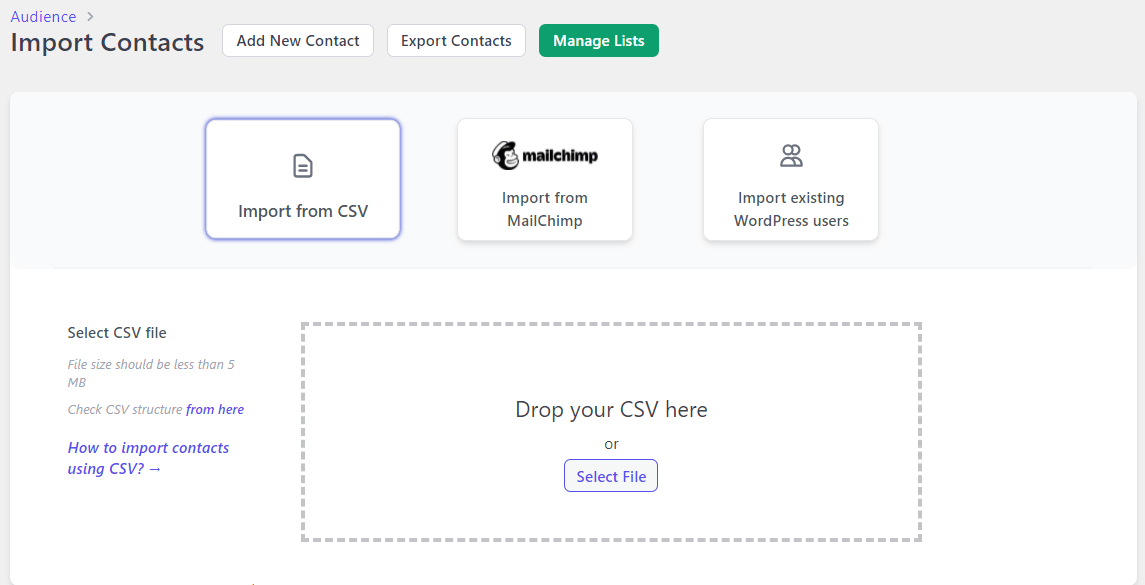
Importing Contacts
Icegram Express lets you add contacts to your subscriber through multiple ways. We recommend you to import contacts right at the beginning if you have contacts exported from others sources (in CSV format).

Please take a look at this article for directions on how to import contacts.
Sending a test email
The plugin allows you to send a test email before creating your first campaign so that you will know whether emails are delivering fine.
To send a test email,
- Navigate to
Icegram Express>Settings>Email Sending - In the input box next to
Send Test Email, enter any email address you have access to and clickSend Email
- See the status and check your email inbox (to which the test email is sent to)
After you sent the email, check for the test email titled "Icegram Express: Test email to" in your inbox and then spam folder. If you couldn't find it in any of them, please report the issue showing the entire screen of General Settings (under Icegram Express > Settings > General). We will review the settings and get back to you.
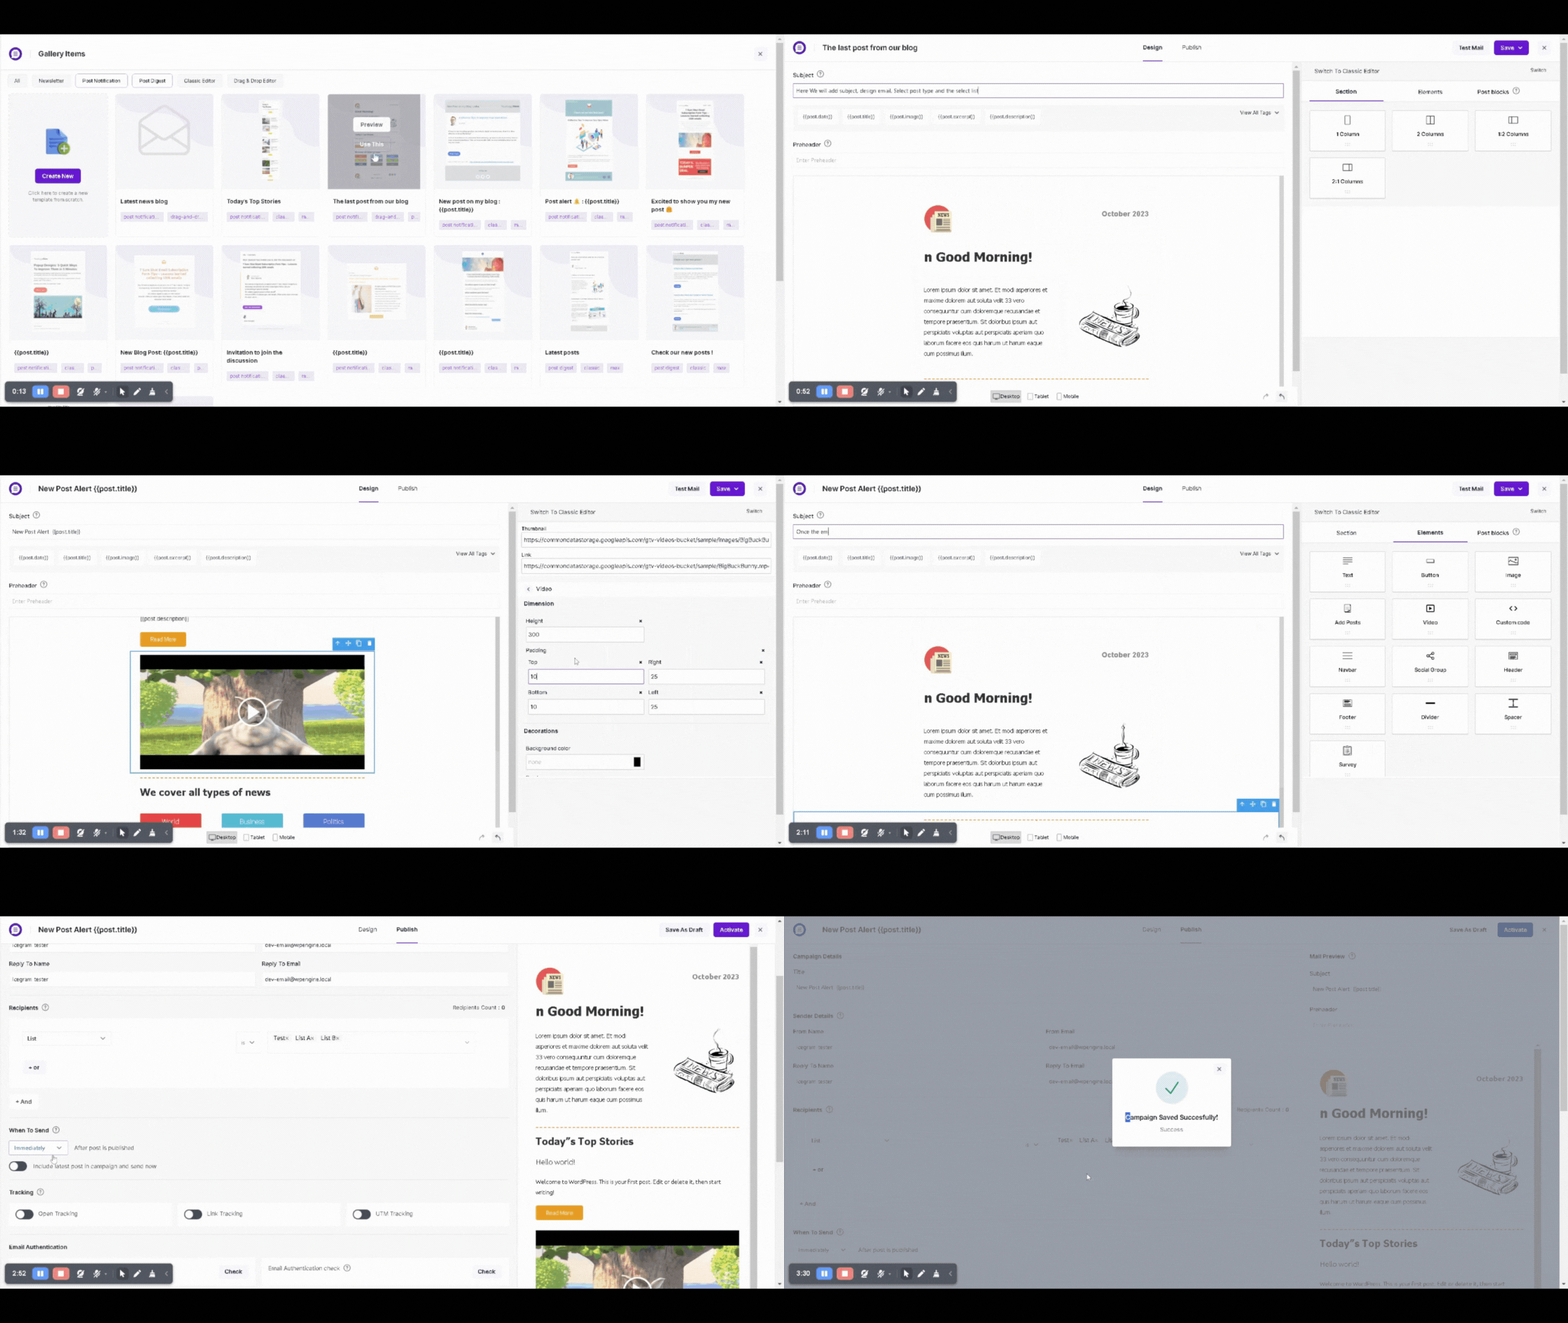
Creating your first Broadcast Campaign
An Email Campaign is an email sent to your audience to promote your brand and increase sales in the highly effective digital marketing strategy. A successful campaign will make the recipients take action, engage with your website or business, and help you get more views and sales.

We offer four types of emailing features and you are welcome to use in a range of occasions.
Please take a look at this article for directions on how to create a broadcast.
Recommendations
Below are few of the settings that we would like to recommend in order to avoid some general issues.
Choose a right mailer
The plugin is a software that generates and tells the server to send emails using the email server and email protocol of your choice. When you setup the plugin, it starts using the mail server which your WordPress setup uses.
You can switch from WP Mail to SMTP for better email deliverability. If you have huge subscription lists or often run campaigns, we recommend using a dedicated mail server or sign up to a third-party email service like Pepipost for smoother delivery whose plans start with $9 per month. You can choose Sendgrid or Sendinblue who offer their basic plans for free if you don’t want to pay for a paid email sending service.
Use a right email id as From email address
Email service providers often block emails if the email server's domain is different from the Sender address.
Emails sent out in this case go out of the email server, but the recipient’s email service provider may block you based on their security policies and predefined rules. To avoid the issue, we recommend setting up an email address in Icegram Express > Settings > General that matches your domain as a sender address as shown in the screenshot for a smoother experience,
E.g.info@example.com , donotreply@wweb.solutions
FROM email
Alternatively, you can simply switch the mailer from WP Mail to SMTP that lets you connect the plugin to your email server using the SMTP protocol. Please note that the option to use the SMTP protocol is available with our Pro and Max packages.
Make sure WP cron is always enabled on the free version
Cron jobs are scheduled tasks that the system runs at predefined times or intervals. Typically, a cron job contains a series of simple tasks that the system runs from a script file and it is required for Icegram Express to schedule emails.
WordPress comes with its own cron system which allows WordPress websites to perform scheduled tasks and we use that on the free package for email scheduling. We recommend you to keep it enabled all the time unless you want to upgrade to our paid plans.
Disable WordPress Cron
However, WP cron is not reliable for email scheduling, so we recommend you upgrade to Icegram Express Pro or Max to send emails reliably. After upgrading to Icegram Express Pro or Max plans, our cron server checks your pending queues every 5 minutes and it will take care of the email queues you have, so you can just sit back and relax.
In simple words, we recommend your own cron on the free version or ours on paid plans for reliability. Alternatively, you can set up a cron on your server as directed here.